Guide
How To Invert Colors in Photoshop
Inverting colours is a snap with Photoshop. If you want to apply it to a single picture or a group of photos, here’s how. An image’s original colours are turned into the polar opposites by using a technique known as colour inversion. Using a variety of technologies, including Adobe Photoshop, you may invert an image’s colours.
Color inversion may be accomplished in a variety of methods in Photoshop. This feature is available for both single photographs and numerous images. Photoshop’s colour inversion tool makes it simple to do both of these tasks.
How To Invert Colors in Entire Image
Photoshop allows you to invert the colours of a whole picture or just a portion of an image. In this part, you’ll learn how to use Photoshop to invert all of the colours in a picture.
Here’s how to go about it, step by step:
- Open Photoshop and choose File > Open from the File menu. Make a choice of the picture you’d want to utilise.
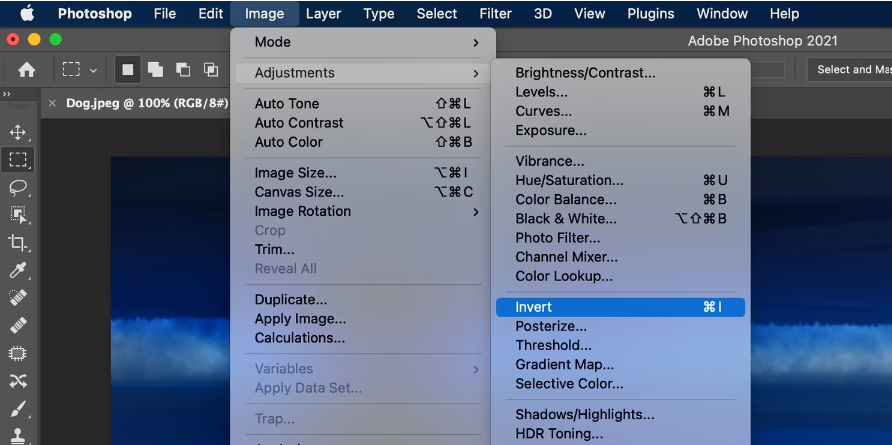
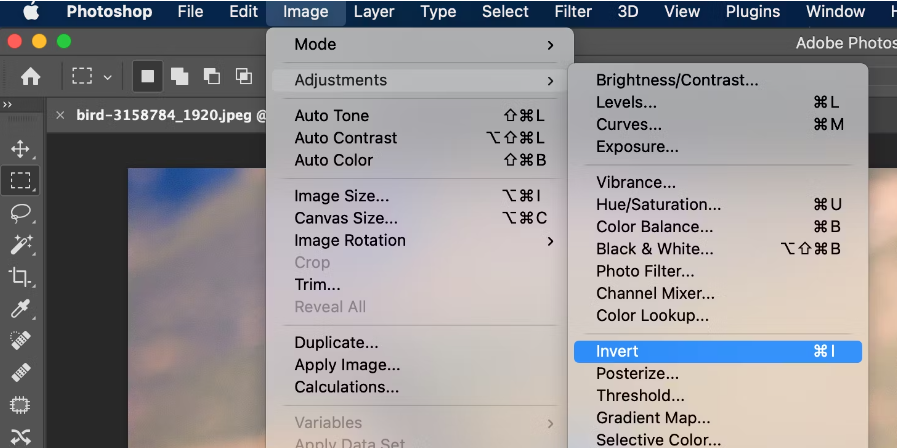
- You may do this by clicking Image > Adjustments > Invert in the menu bar when Photoshop opens the picture.
- It’s time to flip your photo’s colour scheme on its head.
Just click Ctrl + Z (Windows) or Command + Z (Mac) to revert your changes (macOS).
Read More: How to Convert Images to PDFs on Your iPhone and iPad
How To Invert Colors in Photoshop Using a Keyboard Shortcut
Inverting the colours in your photographs may be accomplished with the use of a keyboard shortcut in Photoshop, which will make the process more straightforward and expedient. Simply pressing a certain key combination will cause the colour inversion effect to be applied to the picture you’re working with.
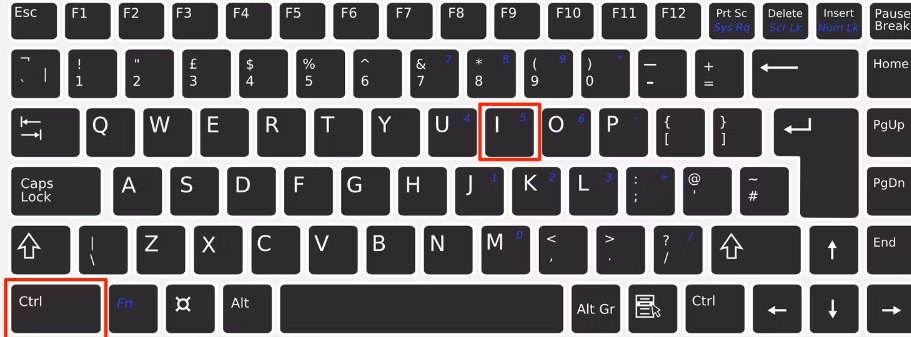
Open the picture whose colours you wish to invert in Photoshop for Windows, then rapidly hit the Ctrl and I keys together. This will invert the colours in the picture. This will make the colours seem the opposite of what they are.
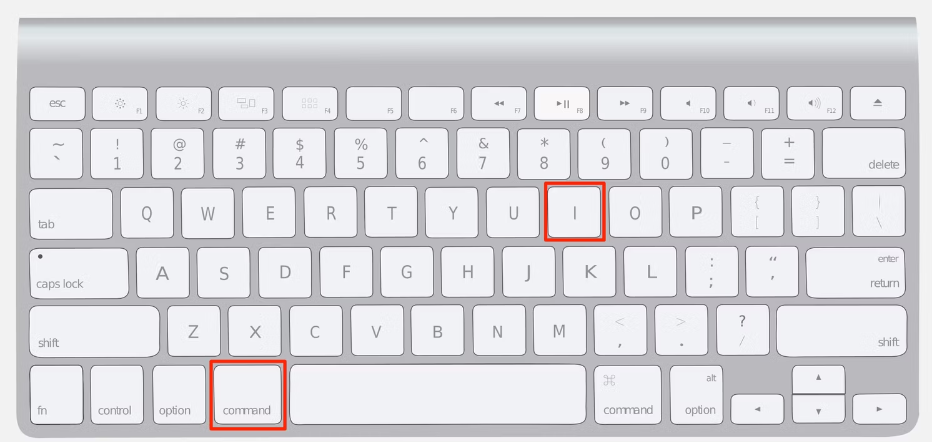
If you want to change the colours in your picture, you may do it on a Mac by using the keyboard shortcut Command + I.
How to Invert the Colors of Multiple Images at Once
Color inversion may be applied to many photographs simultaneously using Photoshop’s Action tool. A few clicks does the inversion work for all of your photographs, saving you from having to do it one by one.
In Photoshop, creating an action to invert an image’s colours is simple:
- A new folder should be created on your desktop and titled “Original.”
- Make a copy of this folder and paste all of the photographs you wish to invert the colours of into it.
- Make a new folder called “Inverted Photos” on your desktop. This is where you’ll find all of your Photoshop-inverted photographs.
- Photoshop may be used to open a picture.
- The Actions panel may be accessed by clicking Window > Actions at the top.
- Add a new action by clicking the Add (+) button in the Actions panel.
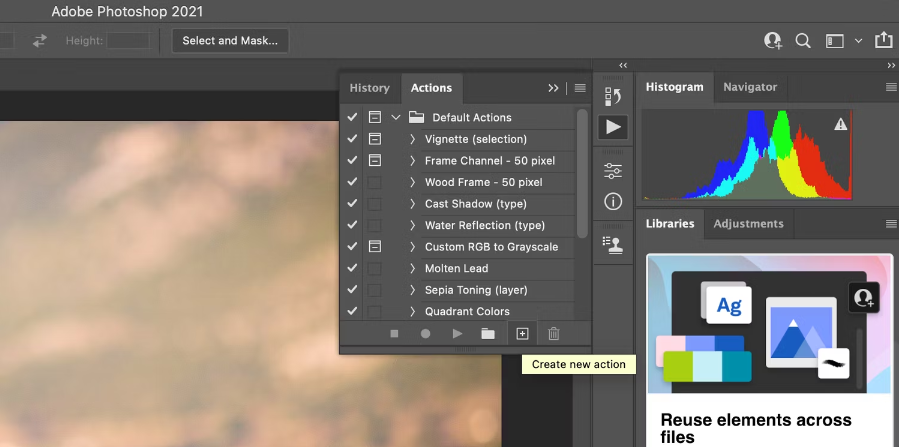
- You may give your action a descriptive name, such as “Invert Photo Colors.” Then click on Record.
- Click Image > Adjustments > Invert to begin recording the action.
- Click the File > Save As option when the colours are reversed.
- The name box should be left blank. Click on Save at the bottom of the page after selecting the Inverted Photos folder you established before.
- Stop recording by clicking the Stop button in the Actions section.
- In Photoshop, go to File > Automate > Batch to flip all of your photographs at once.
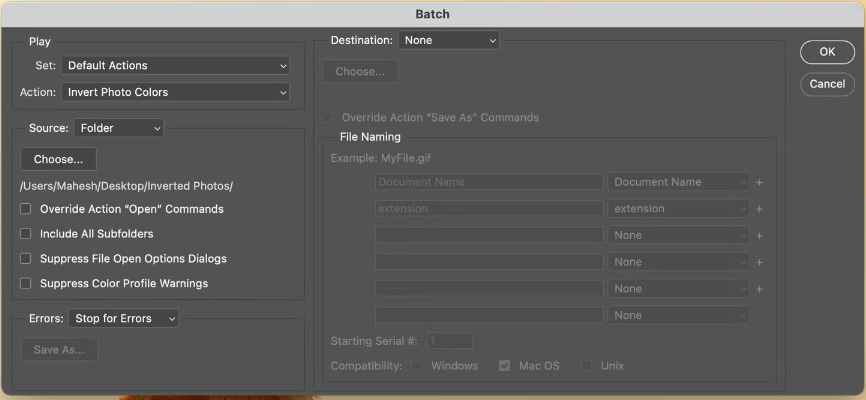
- The Action dropdown menu will now display your newly generated action.
- From the Source drop-down option, choose Folder.
- Select the Original Photos folder on your desktop by clicking Choose under the Folder option.
- In the Original Photographs folder, all of your photos will have their colours reversed after you click OK.
When you use Photoshop to invert the colours of your images, it saves the results in a folder called Inverted Photos on your desktop.
FAQ’s
How do you reverse an image’s colours?
Open up a programme like Microsoft Paint to get started. Open a picture in Paint by selecting “File > Open” or by pressing the Ctrl + O keys on your keyboard. To select the full picture, use Ctrl + A. To invert the image’s colours, do a right-click and then pick the Invert Colors menu item.
What is Photoshop’s invert command?
An item that appears against a solid-colored background may be readily selected with this command. Using the Magic Wand tool, choose the solid colour and then select Select > Inverse.
In Photoshop, where is the option to invert?
Select “Invert” from the “Adjustments” section of the “Image” menu. It’s impossible to erase Photoshop’s colour inversion unless you remove it from your picture. To use the Invert keyboard shortcut, just press “Ctrl–I.”
How do I invert colors on a JPEG?
Edit images by double-clicking them with your left mouse button. The Color Modes option may be found by clicking the Recolor button. Select Negative, which alters the picture such that the colours are reversed.

Vampire Crawlers Coin Farming Guide

Forza Horizon 6 Performance: Why 60 FPS Is Still the Console Standard

Yoshi and the Mysterious Book (2026) – Full Completion Guide, Rewards & Secret Ending

How to Get Free Pets in Adopt Me: A Guide for Players

Roblox Username Generator – Create a Cool & Unique Username in Seconds
How to Get Free Pets in Adopt Me: A Guide for Players

Grow a Garden Recipes in Roblox: Guide to Cook (Donuts, Sushi, Pie, Pizza & More!)
Roblox Username Generator – Create a Cool & Unique Username in Seconds
Yoshi and the Mysterious Book (2026) – Full Completion Guide, Rewards & Secret Ending


