Gaming
How to Make an Anvil in Minecraft
Anvils are not required until you are ready to upgrade your armour, tools, and weapons to have the greatest enchantments possible, which is not a must considering how pricey they can be to players with new worlds.
Anvils are among the few blocks, along with gravel, sand, and the dragon’s egg, that are influenced by gravity, which means that they fall through the air until they come into contact with another solid block. A player can be injured by a falling anvil if it strikes them, which means they can be utilized as (expensive) missiles in certain situations. Even if an anvil falls from a height of 40 blocks, it can deal up to 20 hearts of damage to the player.
Read also: How to Get Honey In Minecraft
How to Make an Anvil in Minecraft?
In a Nutshell:
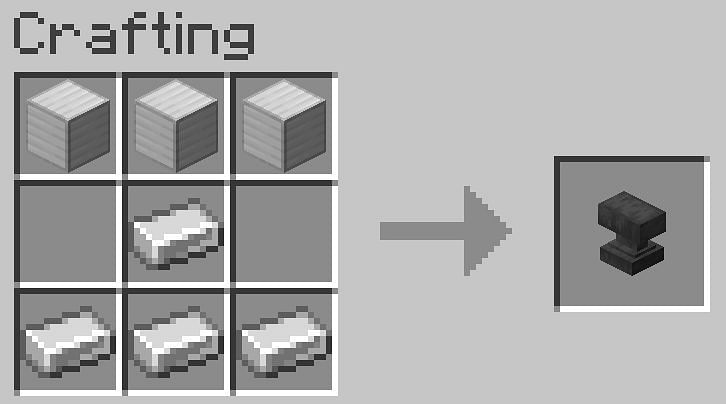
To construct an anvil, you will need to arrange four iron ingots and three iron blocks in a 3×3 crafting grid on the ground. Fill the top row with iron blocks, and then fill the last row with iron ingots to complete the structure. Last but not least, lay 1 iron ingot in the centre of each grid cell. Make sure you put the anvil in your inventory once you’re through using it.
Step-by-Step Guide(with Pictures):
Anvil construction in Minecraft is illustrated in the following step-by-step visual guide: How to Build an Anvil in Minecraft.
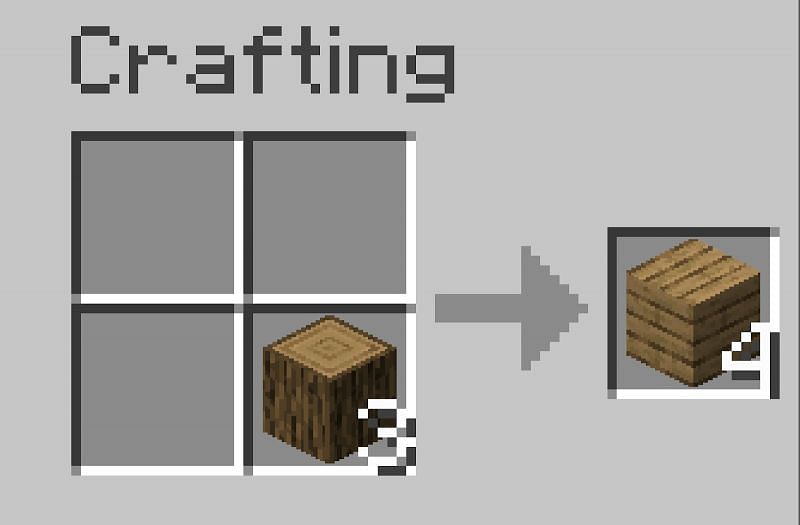
The first item you’ll need is a crafting table, which will be your starting point for making anvil. Convert any recently acquired logs into wooden planks in order to construct a crafting table.
To produce wooden planks, simply insert the logs that have been collected into one of the slots on the survival inventory crafting table, as shown in the illustration below, and the process will be complete.
Once the logs have been transformed into wooden planks, you can proceed to the next step, which is the construction of a crafting table. This post goes into further detail on how to construct a crafting table.
In order to build the most basic sort of pickaxe for collecting your first bits of cobblestone, as well as to make your first anvil once you’ve gathered all of the necessary materials, you’ll need a crafting table. In order to build a furnace, you’ll need cobblestone. The first step in creating a pickaxe is to carve the sticks that will serve as the handle. To manufacture your sticks, you may either utilize the crafting table from your survival inventory or the crafting table you just made.
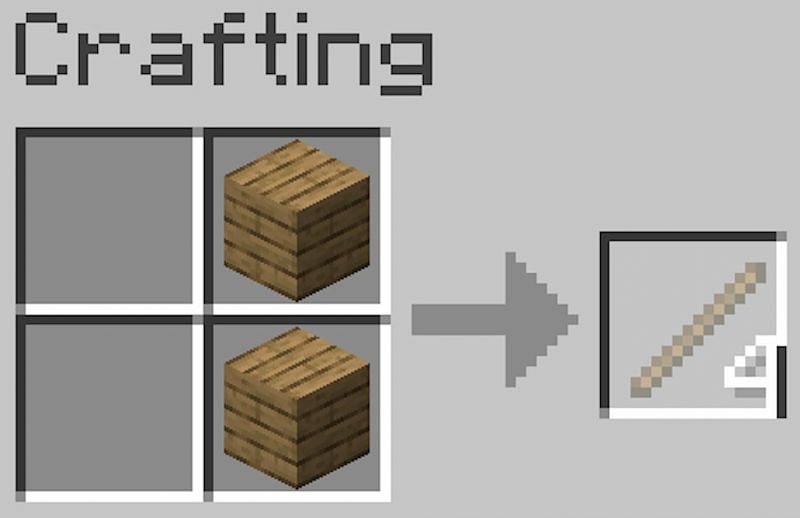
To construct sticks, stack two blocks of wooden planks on top of each other on either the left or right side of the square, as indicated in the illustration above.
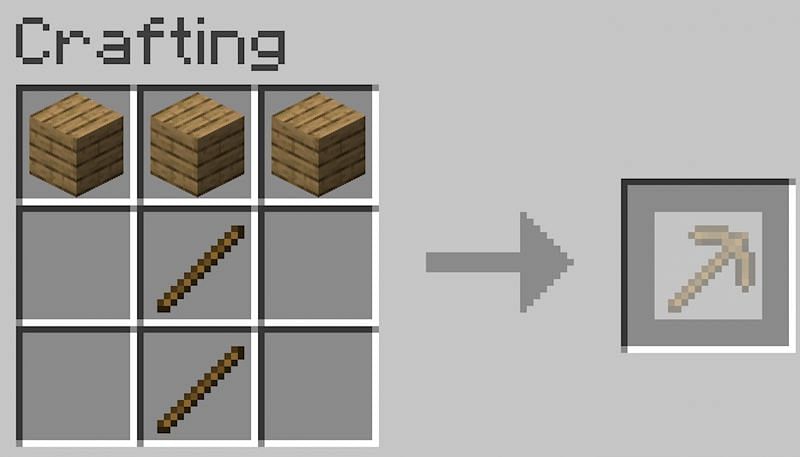
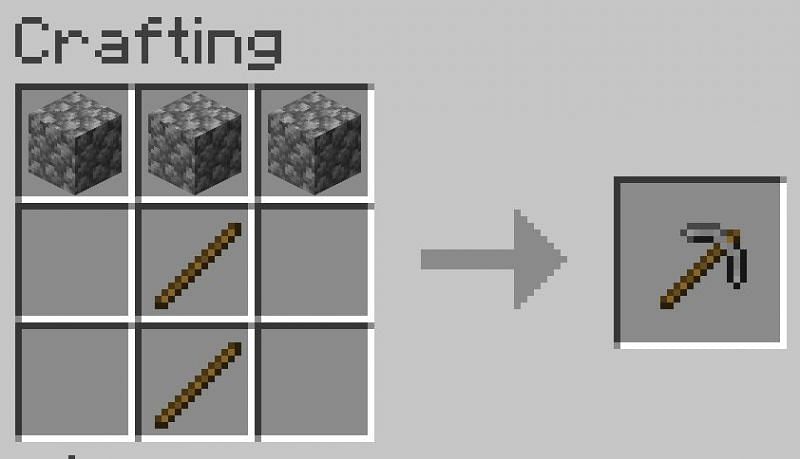
It is now necessary to craft a pickaxe, which may be accomplished by interacting with a crafting table. Afterwards, at the crafting table, arrange a row of planks along the top of the crafting GUI and two sticks under the centre plank, as shown in the illustration above. This will result in the creation of a pickaxe, which you may use to collect your cobblestone, which is a necessary building component for the construction of a furnace.
This article will teach you all you need to know about how to build a furnace. After that, you’ll need to locate some iron and coal.
In order to construct an anvil, you will need to amass a significant amount of iron. Iron, on the other hand, is abundant in caverns and ravines, so collecting the amount of iron you want should not be too difficult or time-consuming. To gather iron, on the other hand, you’ll need at the very least a stone pickaxe. Pickaxes made of iron are more efficient.
To construct a stone pickaxe, follow the same procedure as described above, except instead of wood, use cobblestone instead of wood. An illustration of this is presented below. To construct an iron pickaxe, use the same procedure as before, except instead of cobblestone, use iron ingots instead of the stone.
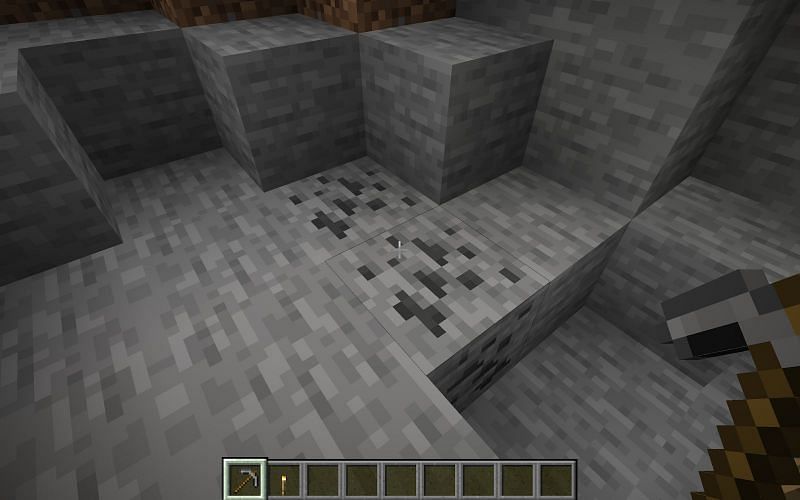
Iron and coal spawn rather regularly, and may be found in abundance near caverns and ravines, on cliffsides, and even on the surface of the planet in stone-topped biomes, for example.
Once coal has been discovered, it must be mined. When smelting this amount of iron, coal is the most convenient sort of fuel to utilize; however, other forms of fuel such as charcoal or a lava bucket can be used if they are more handy. The search for iron can begin after you have a sufficient supply of coal to process all of your future discoveries.
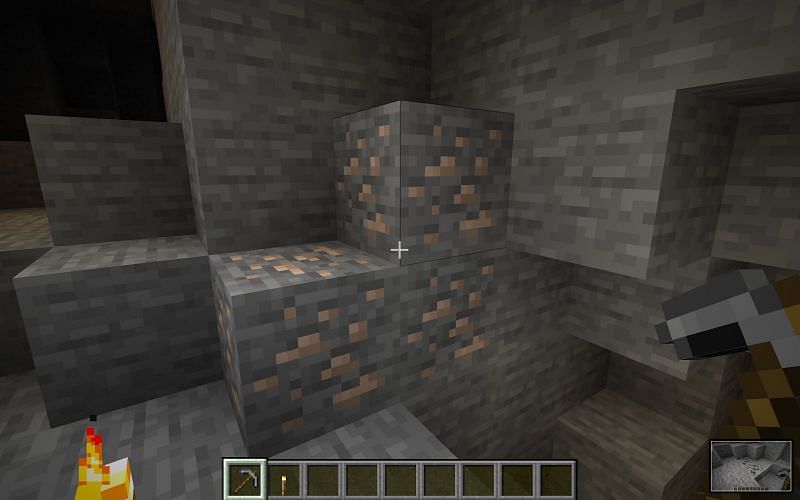
Iron is generated in the same general areas as coal, and it may be found in plenty both above and below ground, in caves on the surface and in underground mines.
It is necessary to smelt your iron when you have located all 31 (or more) pieces of your iron.
To smelt, heat the iron until it is reduced to ingots in your furnace. A blast furnace can also be used, which will smelt the metal twice as quickly as a regular furnace.
To begin, launch the furnace’s graphical user interface.
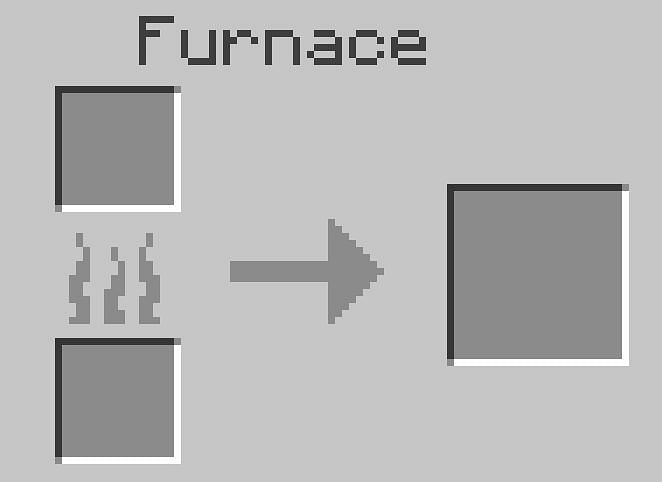
The iron you desire to smelt should be placed in the top slot.
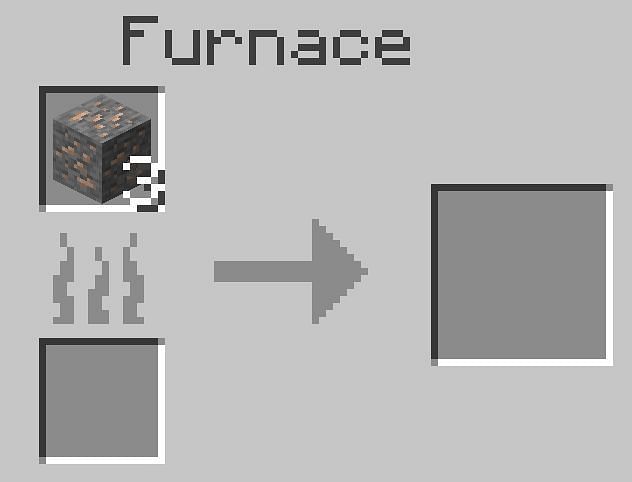
After that, insert your fuel (in this example, coal) into the bottom slot of the boiler.
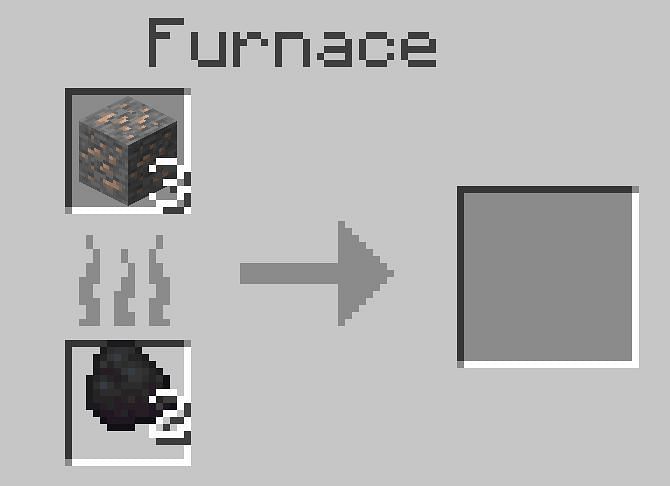
Wait for the progress metre to fill completely before removing your iron.
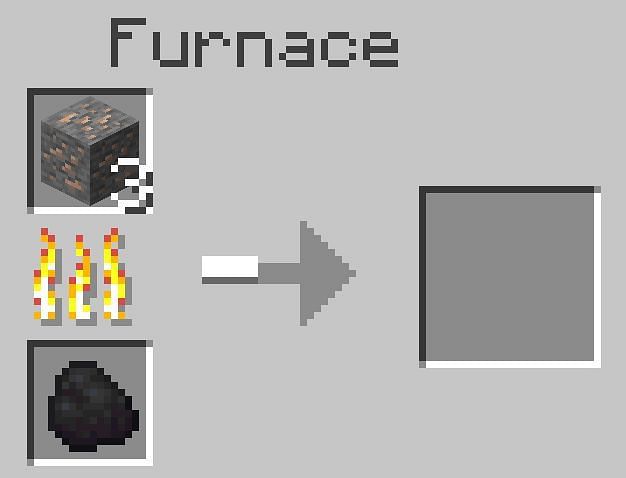
Following the melting of all 31 pieces of your iron ore into iron ingots, you will be able to proceed with the construction of your anvil.
To build an anvil, start by setting up your crafting table and launching the crafting graphical user interface (GUI).
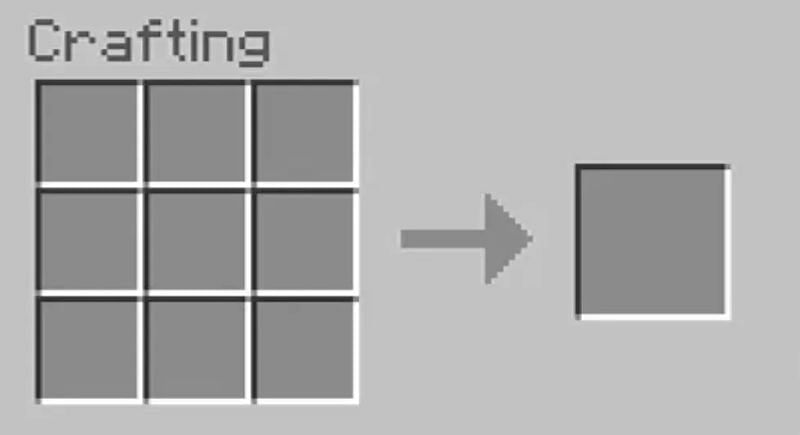
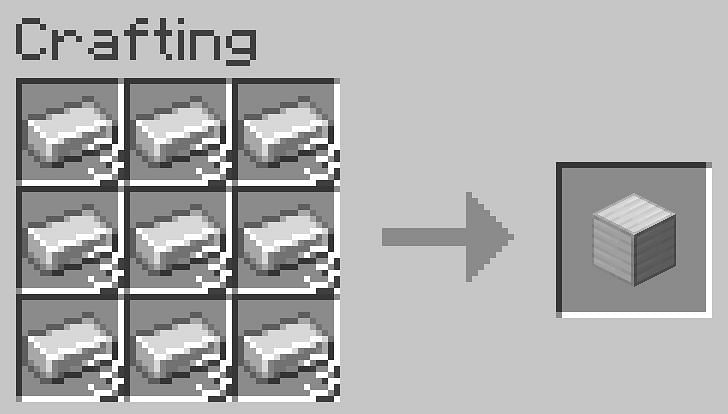
Because this recipe calls for three iron blocks, you must first completely load the crafting table with iron ingots three times in order to produce three iron blocks.
Now that you’ve obtained your iron blocks, arrange them at the top of the row of the crafting table’s work surface. Finally, fill in the middle of the second row with one iron ingot before filling in the entire last row with iron ingots to finish off the task at hand. It should have the appearance displayed below.
Video
FAQS
What can you make with an anvil?
Anvils may be used for a variety of tasks. Anvils, for example, are currently the sole means to combine enchanted books with tools or weapons in the current state of affairs. Using them for other purposes, such as fixing the durability of numerous weapons into one overpowering tool, naming things, and keeping your resources up to date by keeping their durability as high as possible, is a good investment.
How do you repair an anvil?
Unfortunately, there is no way to restore an anvil to its original condition. A smart idea is to keep the anvil crafting recipe on hand in case you need to construct a new one if your old one breaks due to overuse or a fall. Because anvils wear out over time due to usage or fall damage, it’s a good idea to keep the anvil crafting recipe on hand just in case.

Vampire Crawlers Coin Farming Guide

Forza Horizon 6 Performance: Why 60 FPS Is Still the Console Standard

Yoshi and the Mysterious Book (2026) – Full Completion Guide, Rewards & Secret Ending

How to Get Free Pets in Adopt Me: A Guide for Players

Roblox Username Generator – Create a Cool & Unique Username in Seconds
How to Get Free Pets in Adopt Me: A Guide for Players
Yoshi and the Mysterious Book (2026) – Full Completion Guide, Rewards & Secret Ending
Vampire Crawlers Coin Farming Guide


