Guide
How to Insert a Text Box in Google Docs
While some people prefer Microsoft Word, Google Docs is a free alternative that offers a slew of useful features, like the ability to collaborate in real time and a wide range of formatting choices.
For example, adding a text box or a shape in Google Docs can help you make particular information stand out amongst the rest of the document’s material. Learn how to put a text box or custom shapes into Google Docs using the steps below.
Read Also: How to Do Subscript in Google Docs
How to Insert a text box
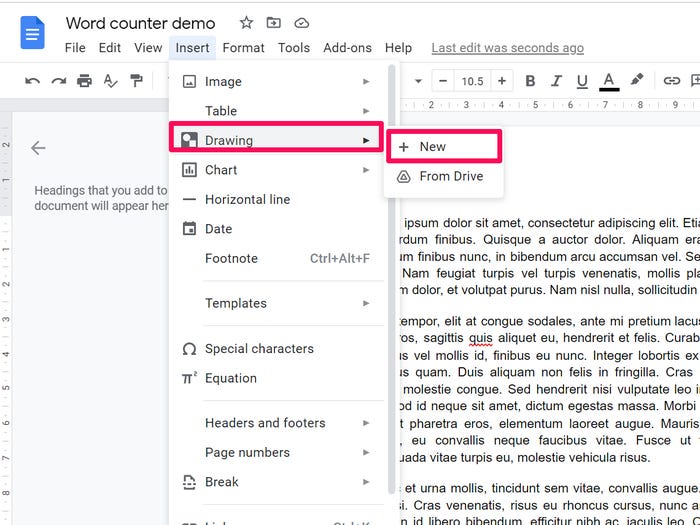
1. Select Insert from the drop-down menu.
2. Select Drawing and then New from the drop-down menu.
3. Select the Text box icon from the drop-down menu.
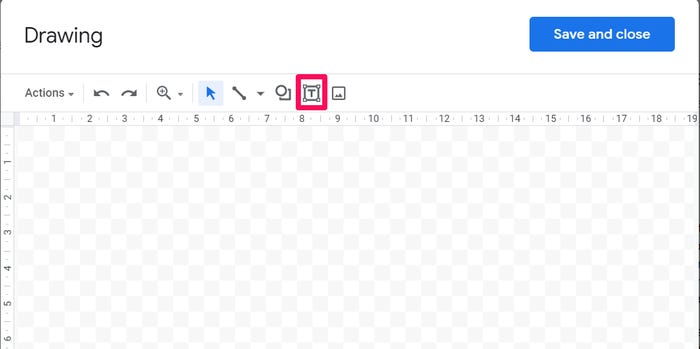
4. Use the mouse to shape the box to the size you desire, then release the mouse button to complete the process.
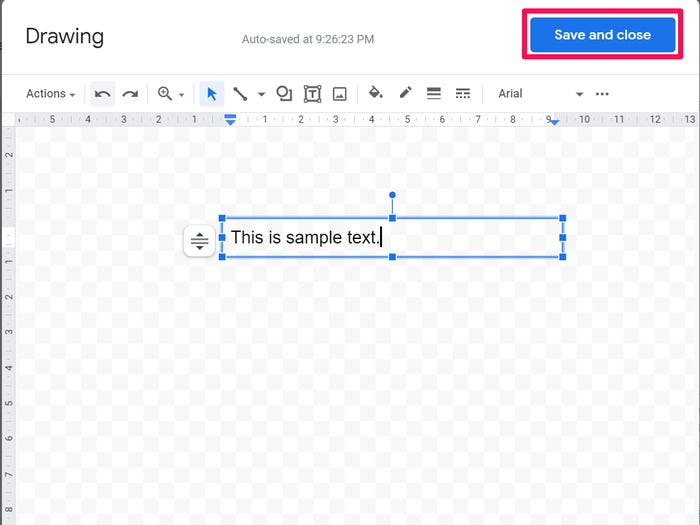
5. Type in the text you wish to appear in the text field, and then click Save and Close to save and exit. After that, you may move the text box and position it wherever you like by clicking and dragging it into position on the screen.
How to Add shapes
1. Select Insert from the drop-down menu.
2. Select Drawing from the drop-down menu.
3. Select the New option.
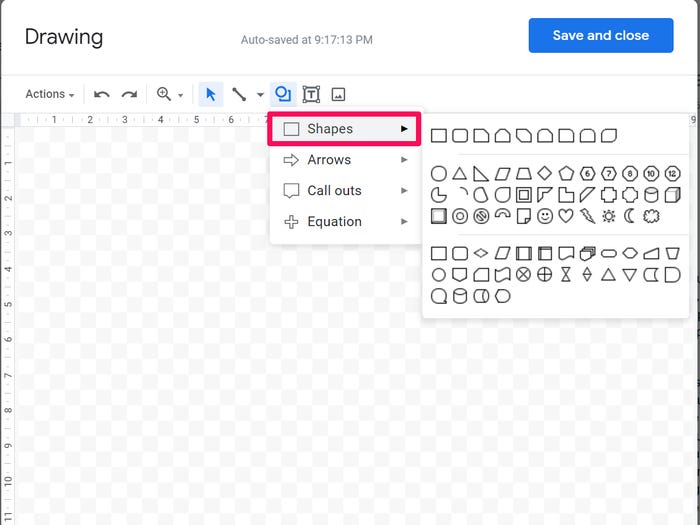
4. Select the Shapes icon, which is immediately to the left of the Text box button, and then click on it.

5. In the drop-down menu that opens, select Shapes. From here, you may choose established forms from a variety of accessible possibilities and then modify it to your specifications.
6. Save and exit the programme when you are finished. The form may then be moved about the document by clicking and dragging, and it can be placed wherever you wish.
How to Customize your text box or shape
1. When you right-click on your form, a contextual menu will open, from which you may pick Edit.
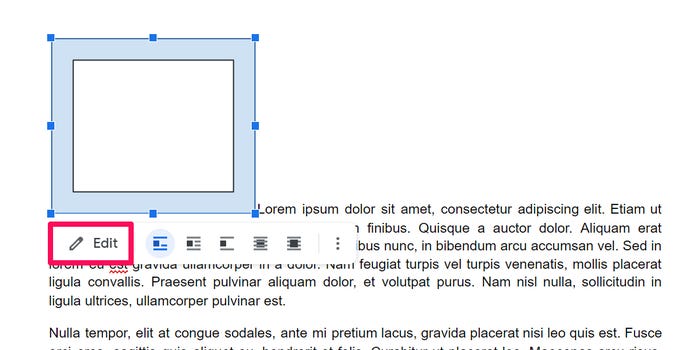
2. Double-click on the form you want to edit. This will bring up a sequence of points that you can click and drag with your mouse to adjust different features of the form, such as the box size or the text included within it, to your liking.

Examples include the ability to stretch and shape your form whereas the orange points allow for precise modification, such as making a happy face frown or removing edges from a shape, and are far less in number.
You may rotate your shape or text box by clicking on the circular blue points that appear above it. To rotate the point, click and hold it for a few seconds before releasing it. Release the mouse button once the object has been rotated to the appropriate position. Don’t be concerned if you don’t get it just perfect the first time; you can always go back and modify the rotation if necessary.
Video
FAQS
How do I add a fillable field in Google Docs?
You can then use the Fillable Document box on the right to construct all of the fields for your fillable document once you’ve finished with the initial configuration. Simply click on the plus sign (+) next to Field List to add a new field. In addition, you have the option of selecting Create New Field. Those fields may then be added to the document by selecting the Insert Field icon from the toolbar.
How do you move text boxes in Google Docs?
By left-clicking at the beginning of a word, holding down the mouse button, and moving the mouse pointer to the right, you may choose some of the text you entered. Once all of the text to be moved has been highlighted, click and hold the mouse button for a few seconds.

Vampire Crawlers Coin Farming Guide

Forza Horizon 6 Performance: Why 60 FPS Is Still the Console Standard

Yoshi and the Mysterious Book (2026) – Full Completion Guide, Rewards & Secret Ending

How to Get Free Pets in Adopt Me: A Guide for Players

Roblox Username Generator – Create a Cool & Unique Username in Seconds
How to Get Free Pets in Adopt Me: A Guide for Players
Yoshi and the Mysterious Book (2026) – Full Completion Guide, Rewards & Secret Ending
Vampire Crawlers Coin Farming Guide


